Key Takeaways:
- There is no way to recover a forgotten iPhone passcode without first erasing the device.
- Your data can be restored after erasing, but only if you have an existing iCloud or Finder/iTunes backup.
- On iOS 15.2 or later, you can reset your iPhone directly from the Security Lockout screen, no cable or computer needed.
The "iPhone is disabled" or "iPhone Unavailable" screens appear after too many failed passcode attempts. The message blocks access to the device, and the first step is to stop entering guesses, since each attempt extends the lockout timer.
Several official methods unlock the device without a passcode, including one that does not require a computer. Unfortunately, every method involves erasing the device.
For complex situations where the standard methods do not work, SalvageData's iPhone unlock service can help and will keep your data safe.
Passcode unlock vs. carrier unlock: what's the difference?
Searching for "how to unlock an iPhone" returns two entirely different categories of content, and landing on the wrong one wastes time.
A passcode unlock removes the security lockout caused by a forgotten or disabled access code. That is what this article covers.
Carrier unlock means removing network restrictions so the phone can be used with a different mobile network. This is handled by your carrier (AT&T, Verizon, T-Mobile, etc.) and is unrelated to your passcode or data.
What "iPhone is disabled" actually means
"iPhone is disabled" appears after too many incorrect passcode attempts. The device locks progressively: after 5 incorrect tries, it disables for 1 minute; after 10 consecutive incorrect attempts, it locks permanently and shows "iPhone Unavailable" or "Connect to iTunes."
Starting with iPhone 8 and iOS 15.2, the lock screen may display "iPhone Unavailable" or "Security Lockout". These refer to the same situation; the label just varies by iOS version.
| Screen message | iOS version | What it means |
| "iPhone is disabled" | iOS 14 and earlier | Too many wrong passcode attempts |
| "iPhone Unavailable" | iOS 15.2+ | Same lockout; includes on-device erase option |
| "Security Lockout" | iOS 17+ | Same lockout; updated label |
This is not a software glitch. It is a deliberate security feature built into every iPhone.
iPhones use hardware-level encryption tied directly to the passcode. Every file, photo, and message on the device is encrypted with a key that only exists when the correct passcode is entered. When that passcode is removed during an erase, the encryption key is deleted along with it.
The data on your iPhone is not deleted when you erase it. It becomes permanently unreadable without the decryption key. This is by design: Apple's encryption architecture makes it technically impossible to access a locked iPhone without the passcode, even for Apple itself.
Understanding this one point will help you make the right call in the next steps.
Can you unlock an iPhone without losing data?
No. There is no supported method to remove a forgotten iPhone passcode without erasing the device. This applies to every iPhone passcode type: 4-digit, 6-digit, or custom alphanumeric.
If Face ID or Touch ID still works and you can access the device, you can update the passcode in Settings without losing any data.
Michael Galloway, data recovery engineer at SalvageData, notes that iPhones with Stolen Device Protection enabled go a step further: they require Face ID to authorize USB connections and enable backups, so connecting to a computer won't help if the device isn't already trusted. In those cases, the Apple ID becomes the only viable recovery path.
If you lost data after erasing a locked iPhone, SalvageData's encrypted data recovery team handles complex cases involving Apple devices. Reach out for a free evaluation to understand what is possible.
How to unlock your iPhone when you forgot the passcode
All four methods below erase the device. Have your Apple ID and password ready before you start, regardless of which method you choose.
Before you start, confirm whether you have:
- An iCloud backup (check at Settings → [your name] → iCloud → iCloud Backup)
- A local backup in Finder (Mac) or iTunes (Windows)
Having a backup does not change the requirement to erase. It just means you can restore your data afterward.
1. Use the Security Lockout screen (iOS 15.2+)
This is the fastest path for most users on a modern iPhone. No cable or computer required.
Requirements: iPhone running iOS 15.2 or later, Apple ID credentials, and internet connection (Wi-Fi or cellular).
Step 1. Allow the incorrect passcode attempts to reach the limit. The Security Lockout or iPhone Unavailable screen will appear.
Step 2. Tap "Erase iPhone" at the bottom of the screen.
Step 3. Enter your Apple ID password when prompted. The device will erase itself and restart automatically.
Step 4. Set up your iPhone as new, then restore from your iCloud or computer backup during setup.
If you don't see "Erase iPhone" on the lock screen, your iOS version is older than 15.2. Use Recovery Mode instead.
2. Erase remotely with Find My (iCloud)
This method works if Find My iPhone was enabled before the lockout and the device has an internet connection.
Step 1. From another device or computer, go to iCloud.com and sign in with your Apple ID.
Step 2. Open Find My and select your iPhone from the device list.
Step 3. Choose "Erase iPhone." This removes the passcode and wipes all content remotely.
Step 4. Once the erase completes, restore from your iCloud backup during iPhone setup.
3. Erase using Recovery Mode (Finder or iTunes)
Use this method when you cannot access iCloud or when the on-device Security Lockout option does not appear. It works on any iOS version and does not require an internet connection on the iPhone itself.
Requirements: A Mac with Finder or a Windows PC with iTunes installed, a USB cable.
Step 1. Turn off your iPhone completely.
Step 2. Enter Recovery Mode using the correct button sequence for your model:
- iPhone 8 or later: Press and quickly release Volume Up, press and quickly release Volume Down, then press and hold the Side button until the recovery screen appears.
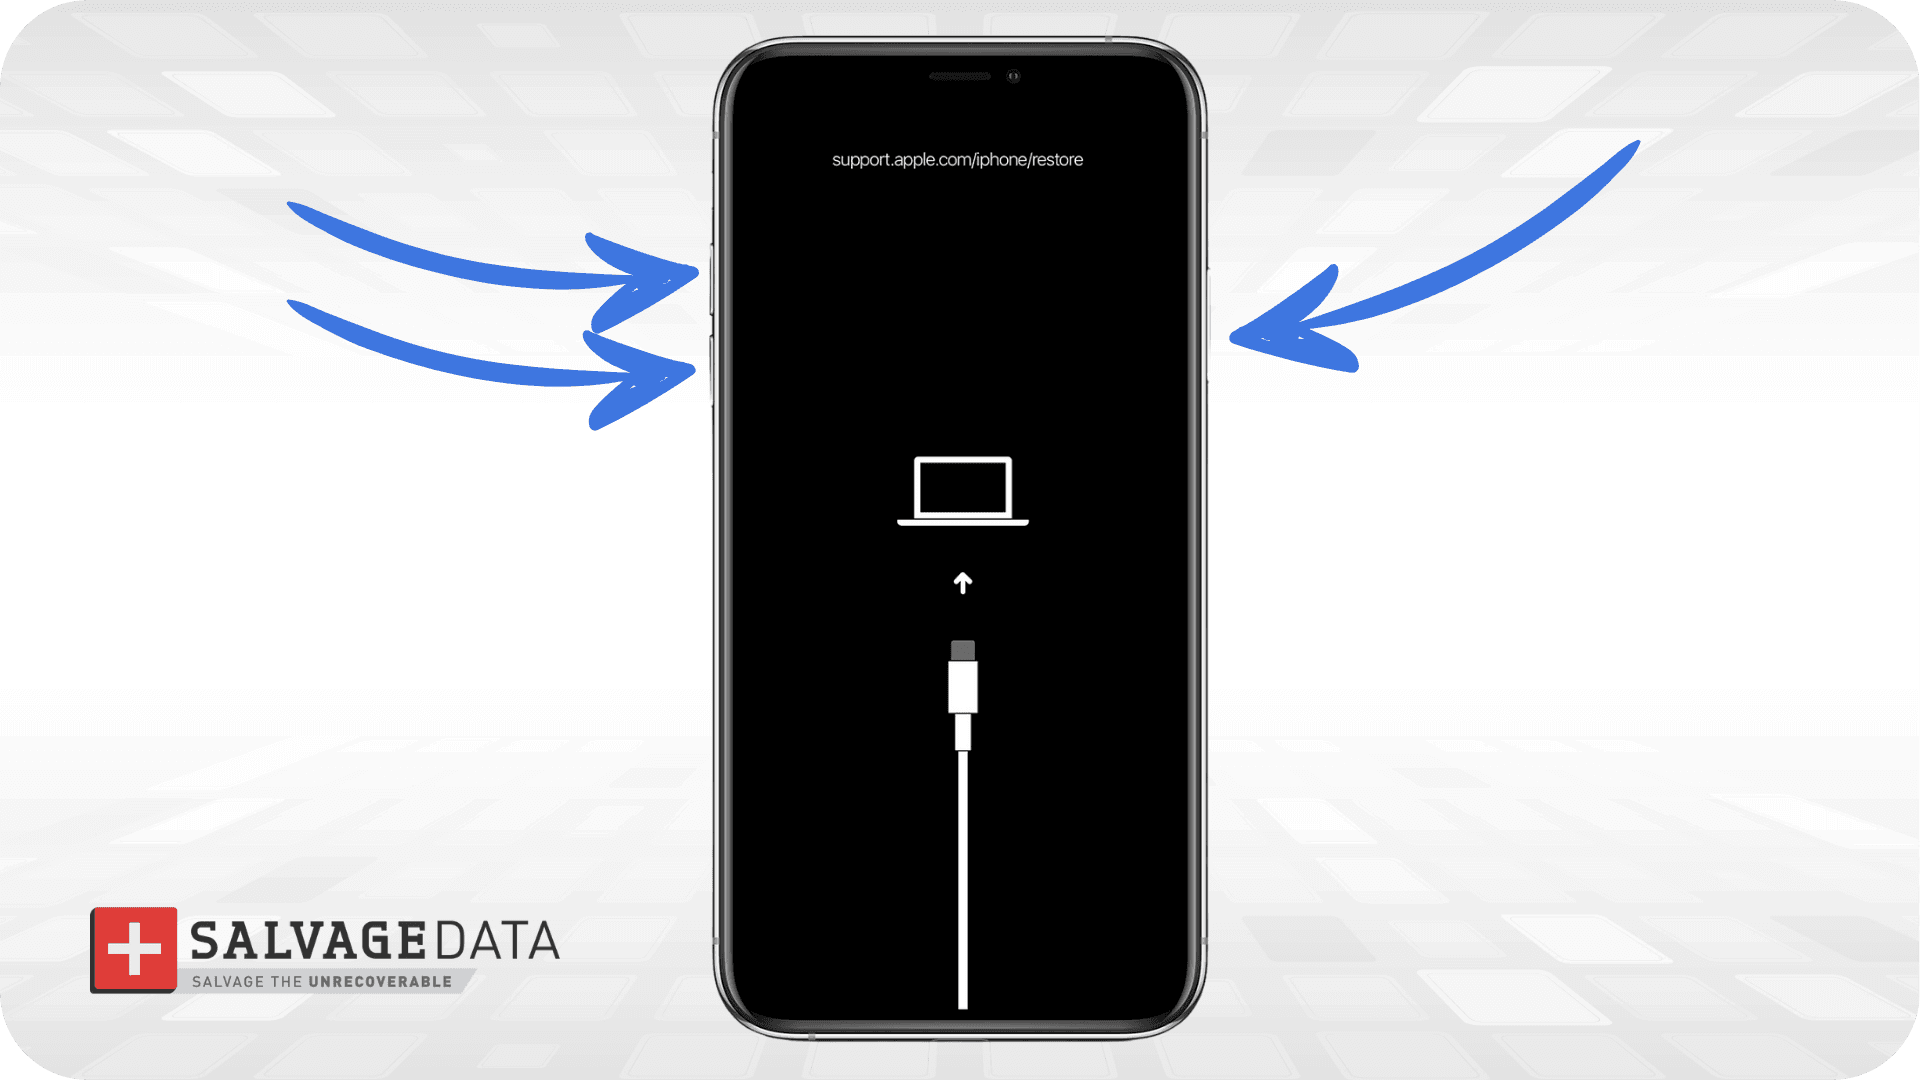
- iPhone SE (1st generation), iPhone 6s, and earlier: Press and hold the Home button while connecting the iPhone to your computer via USB.

Step 3. Keep holding the button until the recovery screen appears on your iPhone (a laptop and cable icon on a black background).
Step 4. In Finder or iTunes, a dialog box will appear offering to Update or Restore. Choose "Restore iPhone."
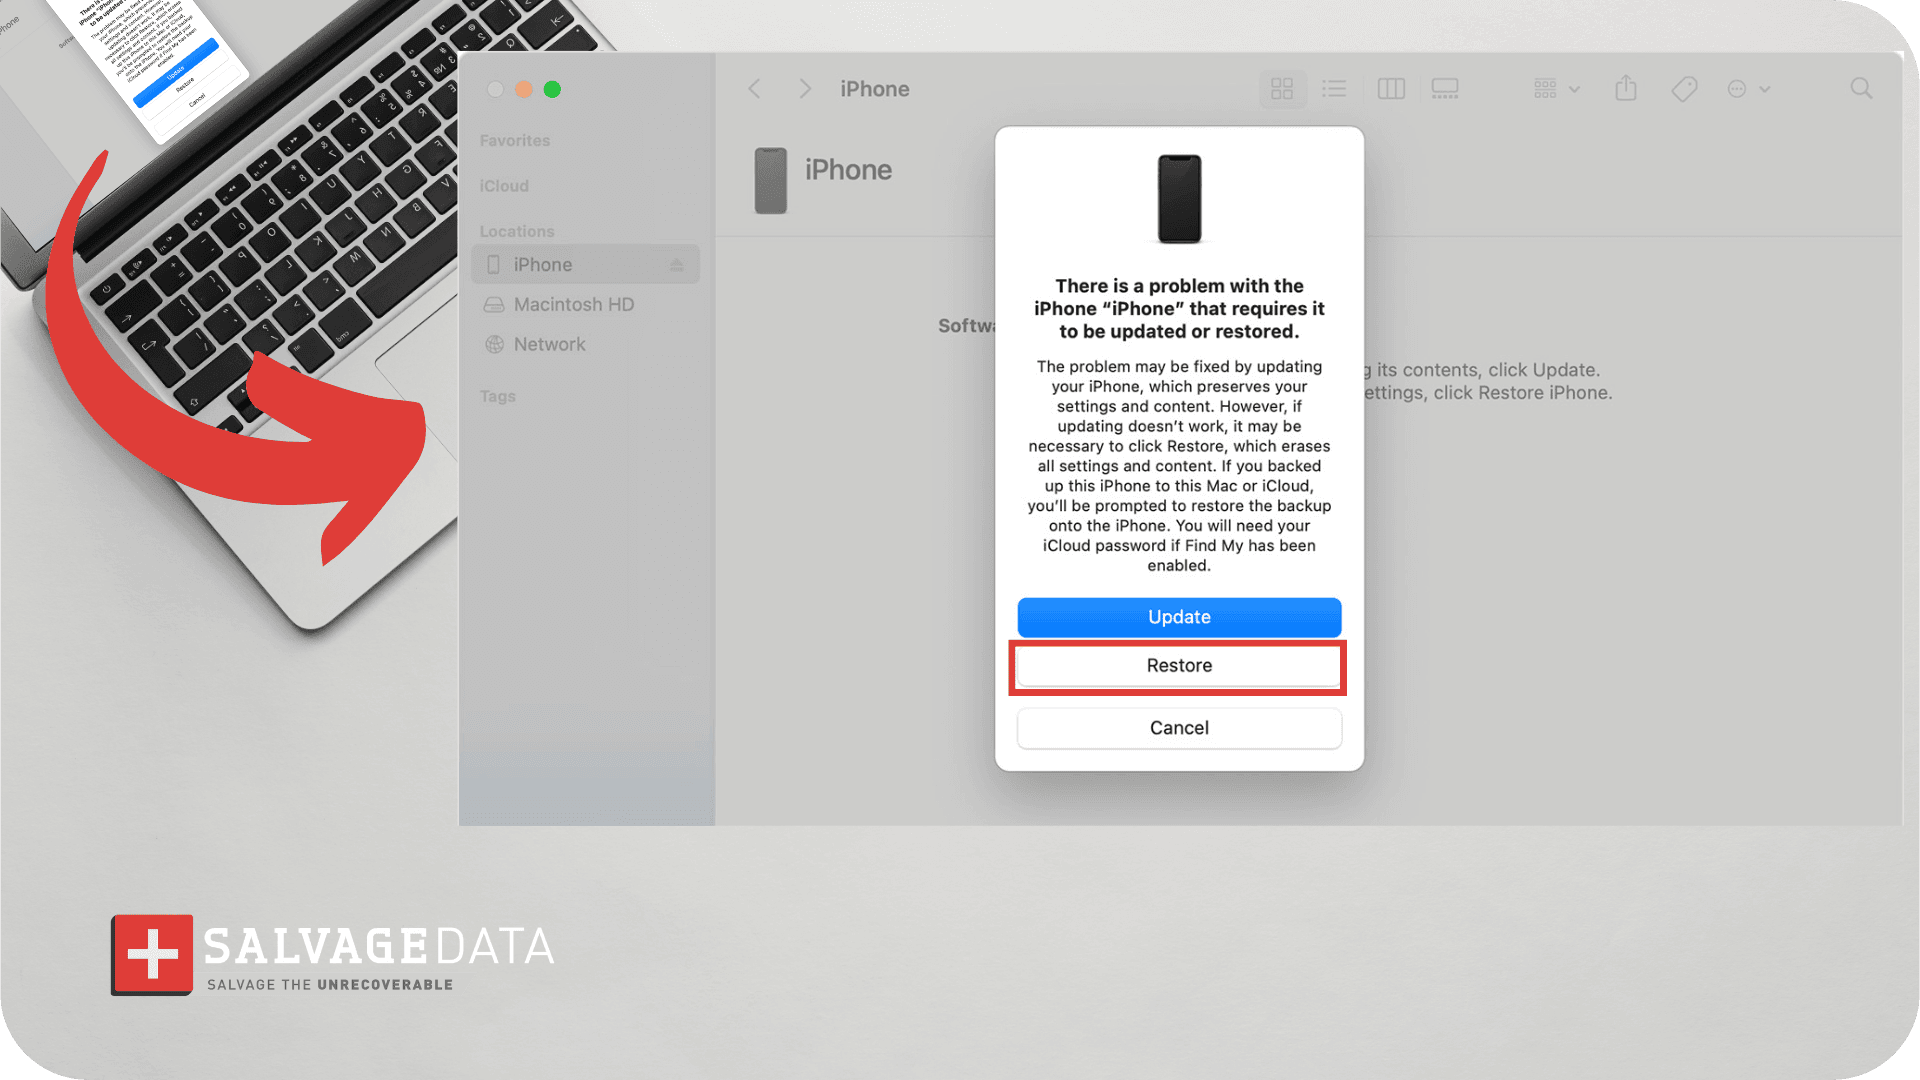
Step 5. Wait for the process to complete. Disconnect the iPhone, then turn it on and complete the setup. Restore from a backup when prompted.
4. Use a third-party tool (last resort only)
Third-party iPhone unlock tools work by attempting to bypass Apple's encryption. This carries security risks similar to those associated with iOS jailbreaking data loss, and most of these tools still require a full device erase. They do not preserve or recover your data.
How to recover your data after unlocking
If a backup exists, getting your data back is a straightforward part of the iPhone setup process.
Restore from an iCloud backup
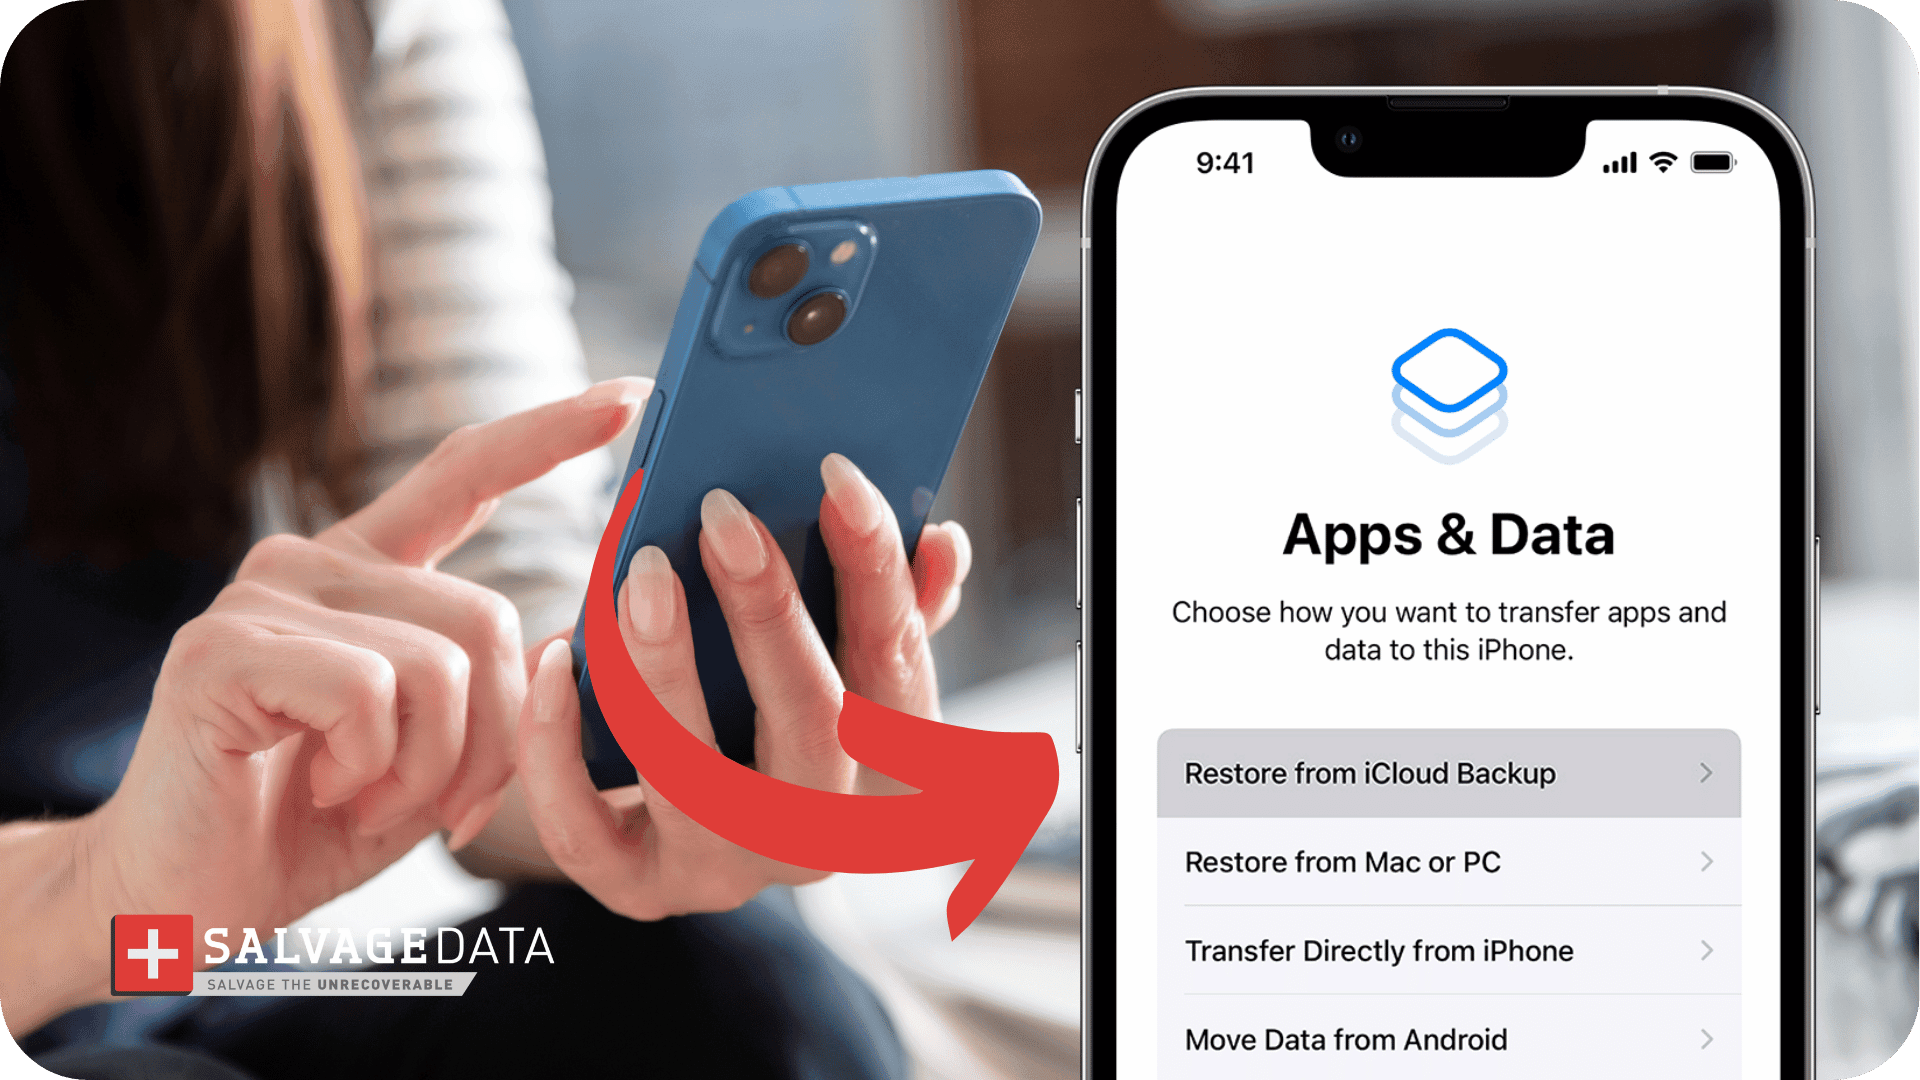
After the erase, during iPhone setup, select "Restore from iCloud Backup" on the Apps & Data screen. Sign in with your Apple ID, select the most recent backup, and keep the phone connected to Wi-Fi until the restore completes.
Restore from a Finder or iTunes backup
Connect your iPhone to the same computer you previously used to back it up. Open Finder (Mac) or iTunes (Windows), select your device, and click "Restore Backup." Choose the most recent backup and wait for the process to complete before disconnecting.
What if you don't have a backup?
This is the hardest iPhone passcode scenario. If no iCloud or computer backup exists at the time of the erase, the data on the device before the reset is gone.
Before assuming all is lost, check these sources:
iCloud-synced services
Photos in iCloud Photos, contacts in iCloud Contacts, and notes in iCloud Notes may still be accessible via iCloud.com, even without a full device backup. Keep in mind that deleting a photo on your iPhone also removes it from iCloud Photos, so not everything may still be there.
Third-party app data
Apps like WhatsApp, Google Photos, and Gmail often sync to their own cloud services independently of iPhone backups. Check each app's account or cloud settings before assuming the data is unrecoverable.
Corrupted backup
If a backup exists but fails to restore, that is a separate and fixable problem. SalvageData's guide on fixing a corrupted iPhone backup covers the most common causes and how to work around them.
Physically damaged
In rare cases involving physically damaged iPhones that are also locked, professional data extraction before erasing may be possible. Contact SalvageData for a free evaluation to determine which options apply to your specific situation.
How to avoid getting locked out again
The best protection against a future lockout and data loss is a combination of biometric authentication and regular, verified backups. Here’s what we recommend:
- Enable Face ID or Touch ID. You will rarely need to manually enter your passcode when biometric unlock is active, which keeps it familiar when you do.
- Back up regularly and automatically. iCloud backups run daily when your iPhone is plugged in, locked, and on Wi-Fi. For a full walkthrough, see SalvageData's guide to backing up your iPhone.
- Choose a memorable but non-obvious iPhone passcode. Avoid birthdays or sequential numbers. A custom alphanumeric code is harder to guess and easier to remember when it follows a logic only you understand.
You can contact SalvageData iPhone data recovery services at any moment and ensure the best professionals help you understand your options to retrieve your photos, messages, and contacts.