Recent Articles
How To Recover Overwritten Files
The Snowflake Data Breach: A Comprehensive Overview
Mac Not Recognizing External Hard Drive: Quick Fix Solutions
How Multi-Cloud Backup Solutions Can Prevent Data Disasters
Capibara Ransomware: What is it & How to Remove
What Should a Company Do After a Data Breach: The Ticketmaster Incident
Secles Ransomware: Removal Guide
What To Do When Your Chromebook Freezes
How to Create Hyper-V Backup
What Is The Best Data Recovery Software For PC

I think there's an issue with my storage device, but I'm not sure Start a free evaluation →
I need help getting my data back right now Call now (800) 972-3282
So you connect your flash drive to your car stereo, hoping to listen to your favorite songs carefully selected for the journey, and, instead, you see Error 23 on the Pioneer screen.
What does Error 23 mean? You see Error 23 on the Pioneer stereo screen after you connect a flash drive to it because the device can’t recognize your USB drive. It could be because the Pioneer can only read the FAT32 drive format or because the partition type differs from MBR.
Top Summary: To fix Error 23 on the Pioneer and regain access to your flash drive with the radio, you’ll have to format it first and then set the proper format and partition to Pioneer stereo can recognize it. So, make a backup of your files and choose the solution that best fits your computer knowledge.
How to fix Error 23 on the Pioneer stereo
You can continue using your USB flash drive at your Pioneer to listen to your favorite songs while in traffic or during your road trip after you format the drive, setting the proper partition type and format.
The only solution to Error 23 is to format the USB flash drive.
Warning: Formatting your USB flash drive will erase all files on it. Before proceeding, make a safe copy of the data to avoid its loss.
Format the flash drive with Disk Management
Insert your USB flash drive to your computer and go to Disk Management.
Step 1. Press Windows key + R to open Disk Management.
Type diskmgmt.msc then click OK.
Step 2. Find the flash drive and right-click on it to select Initialize Disk.
Step 3. Select MBR as the partition style and then click OK.
Step 4. Right-click the Unallocated box to select New Simple Volume. Click next until the tab Choose a File system appears.
Select FAT32 so your Pioneer stereo can recognize the USB flash drive.

Format the flash drive with File Explorer
Step 1. Connect the USB drive to Windows PC.
Step 2. Open File Explore and find the flash drive you wish to format. Make a safe copy of its files before proceeding.
Step 3. Right-click on the USB drive to select Format.
Step 4. Choose the FAT32 from the dropdown list and then click on Quick Format.
When the process completes, click OK to confirm.

Format the flash drive with Command Prompt
Command Prompt is a built-in Windows tool very helpful to fix several errors. But, you must be very careful when using it since any mistake can lead to issues with your device.
Use CMD command
Step 1. Type command prompt in Windows search bar. Right-click on Command Prompt to select Run as Administrator.
Type cmd.
Step 2. Find your USB drive. Type Format /FS:FAT32 E: and hit Enter.
Replace E with your flash drive letter.
The formatting will start, converting the USB flash drive into FAT32.

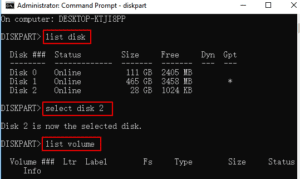
Use DiskPart
Step 1. Type diskpart in the Windows search bar and hit Enter.
Step 2. Type the following commands:
list disk and then hit Enter.
select disk 1. Replace 1 with your USB disk number, and then hit Enter.
list volume and then hit Enter
select volume 1. Replace 1 with the volume number of the USB drive, and then hit Enter.
format fs=fat32 quick and then hit Enter.
Step 3. Type exit and hit Enter.
Your USB flash drive is ready to be used on your Pioneer car stereo.
Use PowerShell
Step 1. Right-click on the Windows icon to open Windows PowerShell Admin.
Step 2. Find your flash drive and then type Format /FS:FAT32 o:
Wait for the formatting process to complete and type Exit.

Format the USB drive on a Mac with Disk Utility
Connect the USB flash drive to your Mac and go to Applications.
Step 1. Select Utilities and choose your USB drive. Then click on Erase.
Step 2. Choose the MS-DOS (FAT) format.
Step 3. Select the Master Boot Record as the scheme and then click Erase.
Once the process finishes, you’ll have your flash drive set as FAT32.
Summary: You have three ways to change the USB flash drive format on Windows and fix Error 23 on the Pioneer stereo. And you can also use your Mac computer to do so. These simple solutions may require some time, depending on how much data you have on your drive. Remember to make a backup before formatting your USB drive.
After following those steps, you should be able to use your flash drive with the Pioneer with no error messages.
If you need any help with your flash drive data, contact SalvageData experts. We’re ready to help you.

