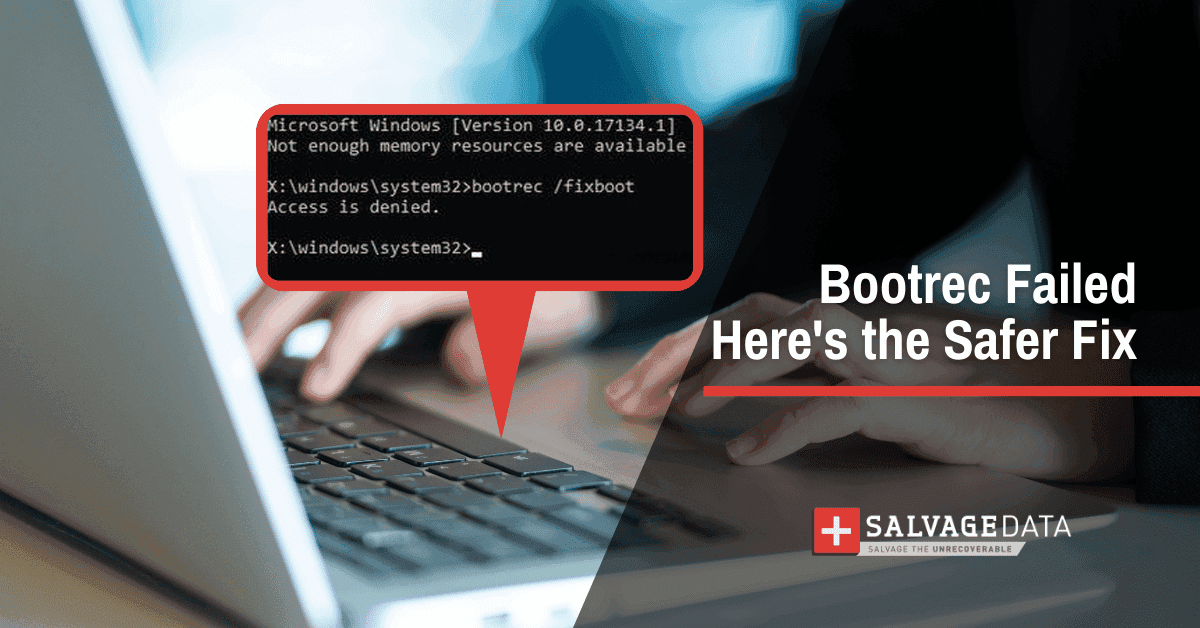

Bootrec /fixboot returns "Access is denied" when Windows Recovery Environment cannot reach the EFI System Partition, when the Boot Configuration Data store is damaged, or when the firmware mode does not match the partition style of the disk. The error is the recovery environment reporting that the path to the boot files is blocked.
Most reports come from Windows 10 and Windows 11 machines running UEFI firmware with NVMe SSDs. If the drive also disappears from BIOS or throws blue-screen errors, the underlying issue may already extend beyond software, and a professional SSD data recovery service is the safer first step. Otherwise, the repair path depends on the cause, and several causes look identical on screen.
What bootrec /fixboot is and when you need it
Bootrec is a Windows command-line utility for repairing boot records, and /fixboot is the parameter that writes a new boot sector to the system partition. Users reach for it when Windows fails to start, and they need to rebuild the records that tell the PC how to load the operating system.
The command does not run from a normal Windows session. It runs from inside the Windows Recovery Environment, the troubleshooting layer Windows boots into automatically after a startup failure or that users launch from a Windows installation USB drive. Inside the Recovery Environment, the path is Troubleshoot, then Advanced Options, then Command Prompt.
Users typically end up there after one of four scenarios:
- A boot loop, black screen, or "Your PC needs to be repaired" message
- A blue-screen error at startup, such as INACCESSIBLE_BOOT_DEVICE or stop code 0xc0000225
- Automatic Repair runs, fails, and offers Advanced Options
- Boot from a Windows installation USB, then select "Repair your computer."
The four-command boot repair sequence
Bootrec /fixboot is almost never run on its own. It runs as the second step in a standard four-command sequence pulled from forums, AI chat answers, or YouTube tutorials. The sequence reads:
bootrec /fixmbr
bootrec /fixboot
bootrec /scanos
bootrec /rebuildbcd
Each command has a specific job. Understanding what each command does can avoid further issues and protect your data.
| Command | What it does |
| /fixmbr | Writes a new Master Boot Record to the system disk |
| /fixboot | Writes a new boot sector to the system partition |
| /scanos | Scans all disks for installed Windows operating systems |
| /rebuildbcd | Rebuilds the Boot Configuration Data store from scratch |
On Legacy BIOS machines with MBR disks, this sequence often works. On modern hardware, /fixboot is the step that breaks.
Diagnose the cause before running any commands
The first step is to identify which of the three failure modes is causing the error: a hidden EFI System Partition, a damaged Boot Configuration Data store, or a firmware mode that no longer matches the partition style. Each mimics "Access is denied" on screen, but each requires a different fix. The same underlying causes often produce the INACCESSIBLE_BOOT_DEVICE error, and the diagnostic checks below apply to both.
When bootrec /scanos shows zero installations
When bootrec /scanos reports "Total identified Windows installations: 0," the recovery environment cannot locate any valid Windows boot configuration. The most likely cause is a corrupted or inaccessible EFI System Partition combined with a damaged BCD store. The drive itself may be intact, but the records that point to Windows are unreadable.
The combination of /fixboot access denied, /scanos zero installations, and /rebuildbcd failure points strongly toward EFI partition damage rather than hardware failure. The fix is to rebuild the boot files from scratch with bcdboot, covered in the next section.
After a BIOS update or CMOS reset
BIOS updates, CMOS battery replacements, and abrupt power loss can silently switch firmware mode between UEFI and Legacy BIOS. A system installed in UEFI mode refuses to boot after the firmware reverts to Legacy, because the GPT partition table is unreadable under BIOS. The boot loader appears damaged, but the data is intact.
If the error appeared immediately after a BIOS update or a CMOS battery replacement, verify the firmware mode before running any other commands. Reversing the BIOS change may restore boot without any disk modifications.
After cloning to an SSD or upgrading to NVMe
SSD cloning and NVMe upgrades often produce this error. When a cloning tool copies a UEFI installation onto a new disk without preserving the EFI partition or GPT partition style, the new drive holds the operating system files but cannot boot them. The system enters the Windows Recovery Environment, and bootrec /fixboot reports "Access denied because the EFI partition is missing, the wrong size, or in the wrong format."
The fix is to recreate the EFI files using bcdboot, which works even when the original EFI partition was not copied cleanly.
When the drive appears intermittently in the BIOS
A drive that appears and disappears in BIOS, requires multiple boot attempts to detect, or shows up under a different identifier each time, is not a software problem. Intermittent BIOS detection points to failing storage hardware, including degrading NAND, controller failure, or loose M.2 connections.
Running bootrec against a drive in this state can make recovery harder. The repair commands write to the disk, and writing to a failing controller can corrupt working sectors and shrink the recoverable footprint. If the drive is intermittent, stop and create an image backup before making any further attempts.
How to fix the error in Windows Recovery Environment
The fastest path through this error is to assign a drive letter to the EFI partition, rebuild the Boot Configuration Data with bcdboot, confirm the firmware mode matches the partition style, and use Startup Repair only as a fallback.
Pro tip: Skip steps that do not match the symptoms diagnosed in the previous section.
Step 1: Assign a drive letter to the EFI partition
The EFI System Partition is hidden by default. Without a drive letter assigned, Windows Recovery tools cannot reach the boot files inside it, which is the most common cause of "Access is denied."
From the Windows Recovery Environment Command Prompt:
diskpart
list volume
Identify the volume formatted as FAT32, sized between 100 MB and 260 MB. Note its volume number. Then select it and assign a drive letter:
select volume N
assign letter=X
exit
Replace N with the EFI partition number and X with an unused letter.
Pro tip: Be careful with volume selection. Assigning a letter to the wrong partition leads to confusion later in the process and, in some cases, to overwriting the wrong volume.
Step 2: Rebuild the BCD with bcdboot (recommended)
The bcdboot tool rebuilds boot files from scratch rather than repairing damaged records, and it succeeds in many cases where bootrec /fixboot fails. This is the most reliable path on modern Windows 10 and Windows 11 systems.
After assigning a drive letter to the EFI partition in Step 1, run:
bcdboot C:\windows /s X: /f uefi
Where C:\ is the Windows installation drive and X: is the letter assigned to the EFI partition. The /f uefi flag tells bcdboot to write UEFI-specific boot files.
The bcdboot command rebuilds boot structures from scratch, which is more reliable than repairing records that may already be corrupted. SalvageData experts explain that the /fixboot command should be avoided on a drive with an EFI or BCD partition, and that repeating the command can also propagate the failure to other partitions.
Step 3: Verify firmware mode matches partition style
GPT disks require UEFI firmware. MBR disks require Legacy BIOS. A mismatch between the two prevents Windows from booting, regardless of whether the boot files are intact.
Enter BIOS or UEFI setup during startup, usually with F2, F10, F12, or Delete, depending on the manufacturer. Look for a "Boot Mode" or "CSM" option. If the disk uses GPT and the firmware is set to Legacy, switch to UEFI. If the disk uses MBR and the firmware is set to UEFI, switch to Legacy or enable CSM compatibility.
To check the partition style from inside Windows Recovery Environment:
diskpart
list disk
A disk with an asterisk under the GPT column uses GPT. Otherwise, it uses MBR.
Step 4: Run Windows Startup Repair as a fallback
Startup Repair handles minor BCD corruption automatically and is safe to run as a last resort.
From Windows Recovery Environment, navigate to Troubleshoot, then Advanced Options, then Startup Repair.
The tool scans for boot configuration issues and applies a standard set of fixes.
Startup Repair is less effective against severe EFI partition damage, partition table corruption, or SSD metadata failures. If it completes and Windows still does not boot, return to Step 2 and rebuild the BCD manually.
Warning signs to pay attention to
Some symptoms mean further repair attempts will worsen recovery odds. If the drive disappears from BIOS, throws SMART errors, or refuses to mount after multiple tries, stop and image the disk before doing anything else. The next command can be the one that pushes the data out of reach.
Stop running repair commands if any of the following occur:
- The drive disappears from the BIOS during repair attempts
- BIOS reports SMART errors or short DST failures
- The drive emits clicking or beeping sounds on HDDs
- A previously detected drive becomes invisible after a reboot
- Bootrec or bcdboot commands complete, but the next reboot fails identically
- The Recovery Environment freezes during command execution
These symptoms point to failing controller hardware, degrading NAND, or mechanical failure that command-line tools cannot fix. For more on what early hardware failure looks like, see the SalvageData breakdown of common SSD failure symptoms.
"Three things consistently make damage worse during a recovery attempt. The first is keeping a damaged drive connected to the system and trying to read from it. The second is using DIY recovery tools on an already-damaged drive, which deepens the failure. The third is saving recovered files back to the same drive they came from, which overwrites data that was still readable," explains Kyle Ciresi, HDD Recovery Engineer at SalvageData.
Ciresi's three rules apply directly to boot repair. The commands write to the disk. Each write to a failing drive risks overwriting the metadata that an imaging tool could otherwise rescue.
Avoid these high-risk DiskPart commands when any of the warning signs above are present:
- clean, which destroys the partition table
- Formatting the EFI partition manually
- Converting a disk between MBR and GPT in place
- Recreating partitions without first imaging the drive
If any of those commands feel necessary to continue, create a disk image first. A bit-for-bit clone can be repaired on a copy, leaving the original untouched as a last-resort recovery source.
What bootrec /fixboot is and why it fails on modern Windows
Bootrec is a Windows command-line utility for repairing boot records. The /fixboot parameter writes a new boot sector to the system partition. However, on modern UEFI and GPT systems, there is no traditional boot sector to write to, which is why the command returns "Access is denied" on most Windows 10 and Windows 11 machines.
Why UEFI and GPT changed everything
UEFI firmware replaced Legacy BIOS as the standard on modern PCs, and it boots differently. Instead of writing boot code into a Master Boot Record (MBR) sector, UEFI reads boot loader files from a dedicated FAT32 partition, the EFI System Partition. That partition ranges from 100 MB to 260 MB, is hidden by default, and exists only on GPT-partitioned disks.
Bootrec was designed for BIOS. On a UEFI system, /fixboot tries to write a boot sector that does not exist, cannot reach the EFI System Partition because it has no drive letter assigned in the Recovery Environment, and returns "Access is denied."
What the BCD stores and why corruption breaks /fixboot
The Boot Configuration Data, or BCD, store is a binary database that tells Windows which operating system to load, where to find it, and which boot options to apply. A damaged BCD causes bootrec /scanos to report zero installations and /rebuildbcd to fail, even when the Windows files themselves are intact.
When to send the drive to a data recovery lab
Send the drive to a professional lab when repair commands have failed, when the drive shows intermittent BIOS detection or SMART warnings, or when the data on the disk is more valuable than the time and risk of further DIY attempts. Most logical failure cases recover successfully when caught early.
A data recovery service can do three things that command-line tools cannot. First, it can image a failing drive on dedicated hardware that gracefully handles read errors, preserving every recoverable sector.
Second, it can rebuild a damaged file system from the imaged copy, leaving the original untouched. Third, in physical failures, it can replace components such as the controller or PCB in a controlled environment.
Two scenarios make professional recovery the safer first call:
- The drive is intermittent or has SMART warnings, and the data is critical
- Repeated repair attempts have produced new symptoms, such as a drive that previously mounted and now does not
SalvageData performs a free diagnostic before any chargeable work begins and operates on a no-data-no-charge policy. If the drive is still detected by the BIOS and the data has not yet been backed up, request a diagnostic before running any other commands. Every additional repair attempt narrows the window for clean recovery.