- The iPhone “Attempting data recovery" message usually appears after unexpected shutdowns, system crashes, or interrupted updates.
- Our experts share 6 at-home solutions to troubleshoot and restore access to your iPhone and data.
When an iPhone displays the "Attempting Data Recovery" message, it means that the device is stuck in a continuous loop, trying to restore data from a previous state or backup. This often occurs following an unexpected shutdown, a system crash, or an abrupt reboot. While the message can be alarming, leading users to fear the permanent loss of their personal data, it is important to note that in many cases, the situation is recoverable.
The first thing to do is to be patient. The iPhone's internal recovery mechanism is triggered when the device enters an unstable state, and its primary function is to protect data integrity. Therefore, the system may simply require sufficient time to complete its self-repair process. Our experts recommend connecting the device to a reliable power source and allowing it to operate undisturbed for a period, potentially half an hour or even longer, depending on the volume of data being processed. Interrupting this process prematurely can lead to further complications or potential data loss.
Why are you seeing the “Attempting Data Recovery” error message?
While often software-related, hardware integrity and user actions also contribute to this problem, including:
- Software-related issues
- Misuse and human errors
- Storage issues
- Hardware problems
- Malware or virus Infection
Let’s break down each of those issues.
Software-related issues
One of the most frequent culprits for the “Attempting Data Recovery” error message is an interrupted iOS update process. If an iOS update is disrupted due to factors such as a low battery, an unstable internet connection, or other unforeseen issues, the iPhone may become stuck in a data restoration attempt. This includes instances where the iPhone is disconnected during an update initiated via iTunes.
Attempting to downgrade to an older iOS version is a complex and often unpredictable process that can similarly lead to the data recovery problem.
Lastly, incompatible or buggy applications that are not fully optimized for the latest iOS version may create conflicts, preventing the device from successfully completing its recovery procedure.
Misuse and human errors
Some user actions can directly initiate the data recovery loop. Unplugging the iPhone from a PC or Mac during an update is a direct and common cause of this issue.
Another significant risk is jailbreaking, which involves unauthorized modification of iOS. This process bypasses Apple's security features, leading to system instability, frequent crashes, and a heightened risk of data loss.
Storage issues
Insufficient available storage space on the iPhone can prevent the upgrade process, often leaving the device trapped in a recovery loop.
Specific error codes, such as Error 14 and Error 1110, are also direct indicators that the device's storage is at capacity, frequently resulting in the iPhone becoming stuck in reboot loops.
Hardware problems
While less common than software issues, physical damage can also lead to this problem. Impacts from drops, exposure to water, or other accidents can cause the iPhone to malfunction and initiate data recovery attempts.
Malware or virus Infection
Malicious software (malware) or viruses can corrupt the iPhone's operating system, leading to unexpected shutdowns and subsequent attempts to recover data.
How can you fix “Attempting Data Recovery” on iPhone
When an iPhone becomes stuck on the "Attempting Data Recovery" screen, a systematic approach to troubleshooting is recommended, starting with the least intrusive methods to minimize the risk of data loss.
SalvageData experts compiled four ways you can try to fix your iPhone and remove the Attempting Data Recovery screen from your iPhone. You can also follow these solutions if your iPad is showing the error Attempting Data Recovery after an update.
1. Press the Home button
Sometimes, the easiest solution is the right one. Pressing the Home button and waiting for the update to complete will lead to the iPhone returning to its previous state.
However, if it takes too long, then move to the next solution or call for professional help.
2. Force restart your iPhone
A force restart, also known as a hard reset, differs from a standard restart because it abruptly cuts power to the device and forces it to reboot without going through the normal shutdown sequence.
This action can effectively refresh the iPhone's memory, clear temporary cache files, reload applications, and often resolve a wide array of iPhone issues, particularly when the device is unresponsive or frozen. It is particularly effective for transient software glitches that may cause the recovery loop.
The steps to perform a force restart vary depending on the iPhone model:
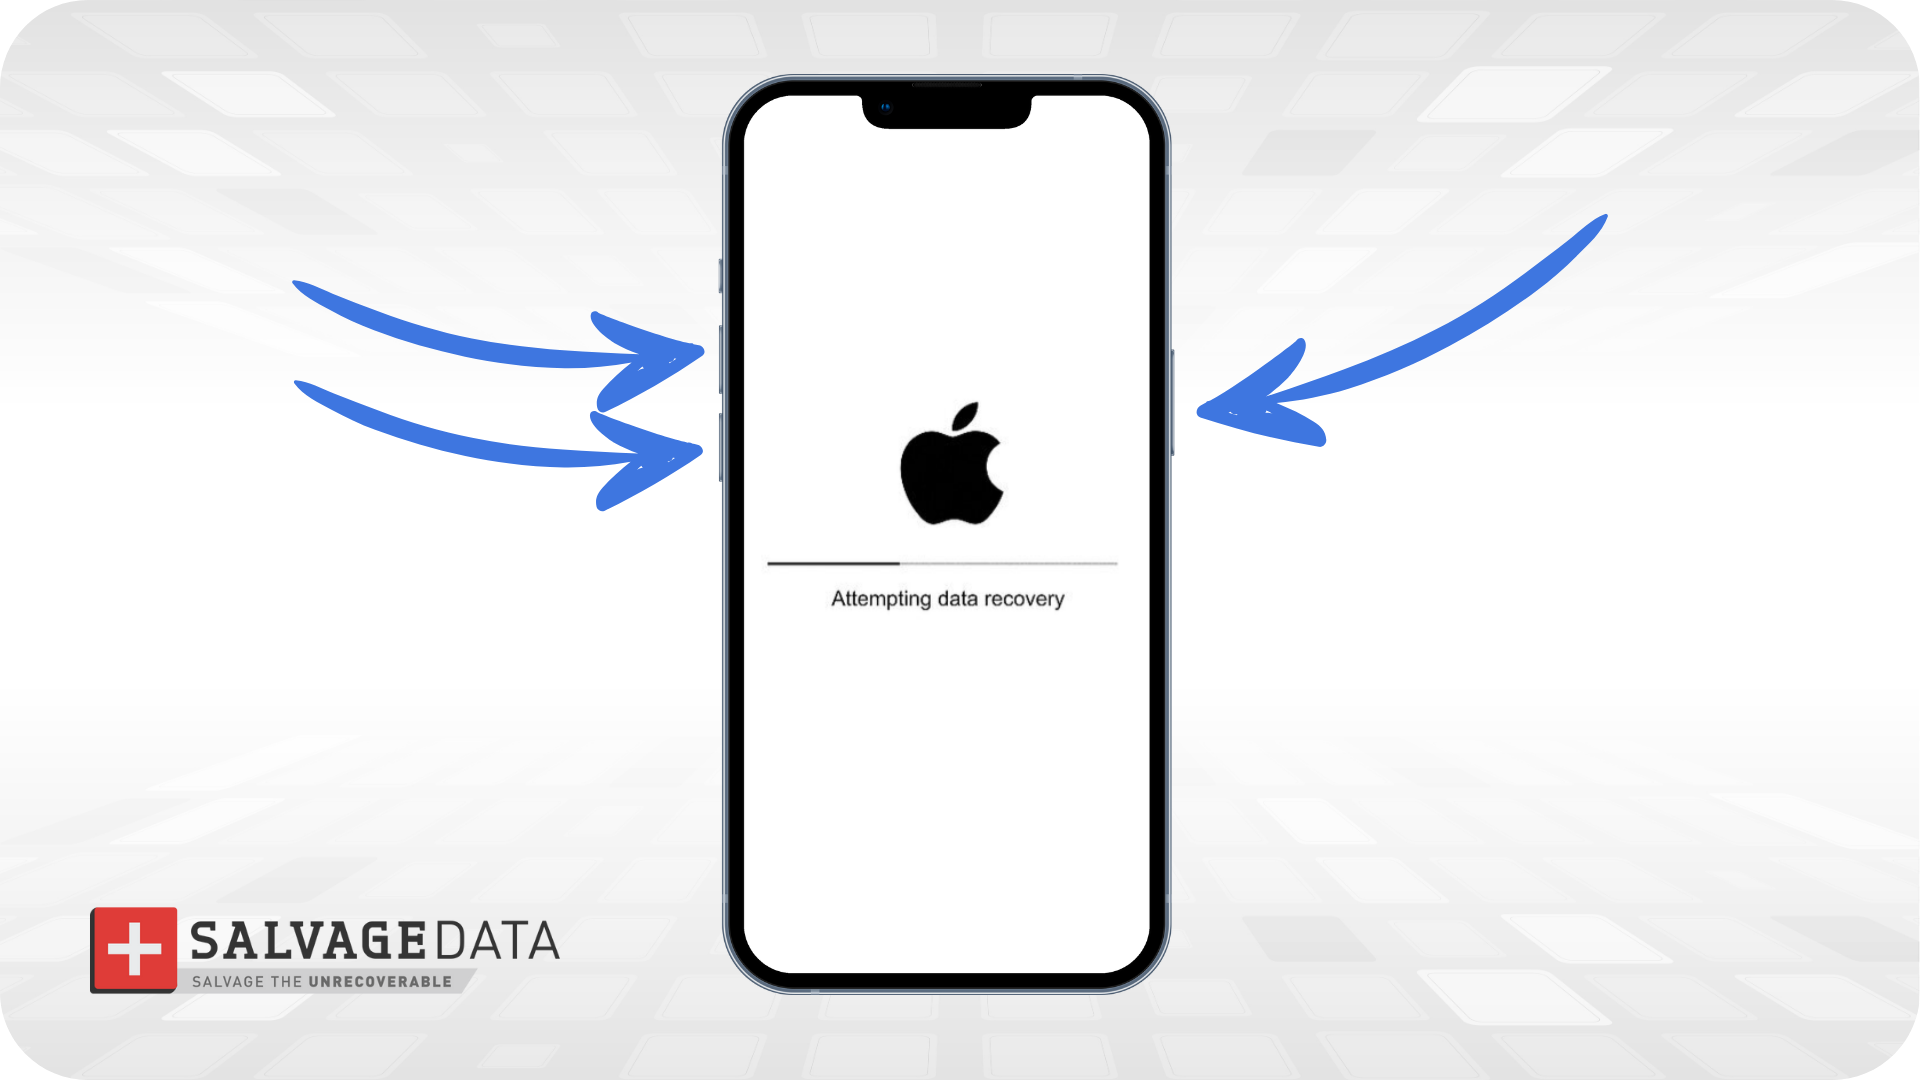
iPhone 8 and all the recent versions
Step 1. Press and fast-release the Volume Up button.
Step 2. Press and fast-release the Volume Down button.
Step 3. Press and hold the Power button until the Apple logo appears.
iPhone 7 and 7 Plus
Step 1. Press the power button and volume down button at the same time.
Step 2. Keep holding the side buttons until the Apple logo appears.

3. Use iTunes/Finder to update or restore
If a force restart does not resolve the issue, connecting the iPhone to a computer and using iTunes or Finder is the next step.
Pro tip: Ensure that iTunes is updated to its latest version on the computer.
For macOS Catalina or later, use Finder. For macOS Mojave or earlier, or Windows, use iTunes.
Step 1. Connect the iPhone to the computer using a USB cable.
Step 2. Put the iPhone into Recovery Mode.
Step 3. Enter Recovery Mode by forcing your iPhone to restart. Keep holding the designated buttons until the "Connect to iTunes" or recovery mode screen appears.
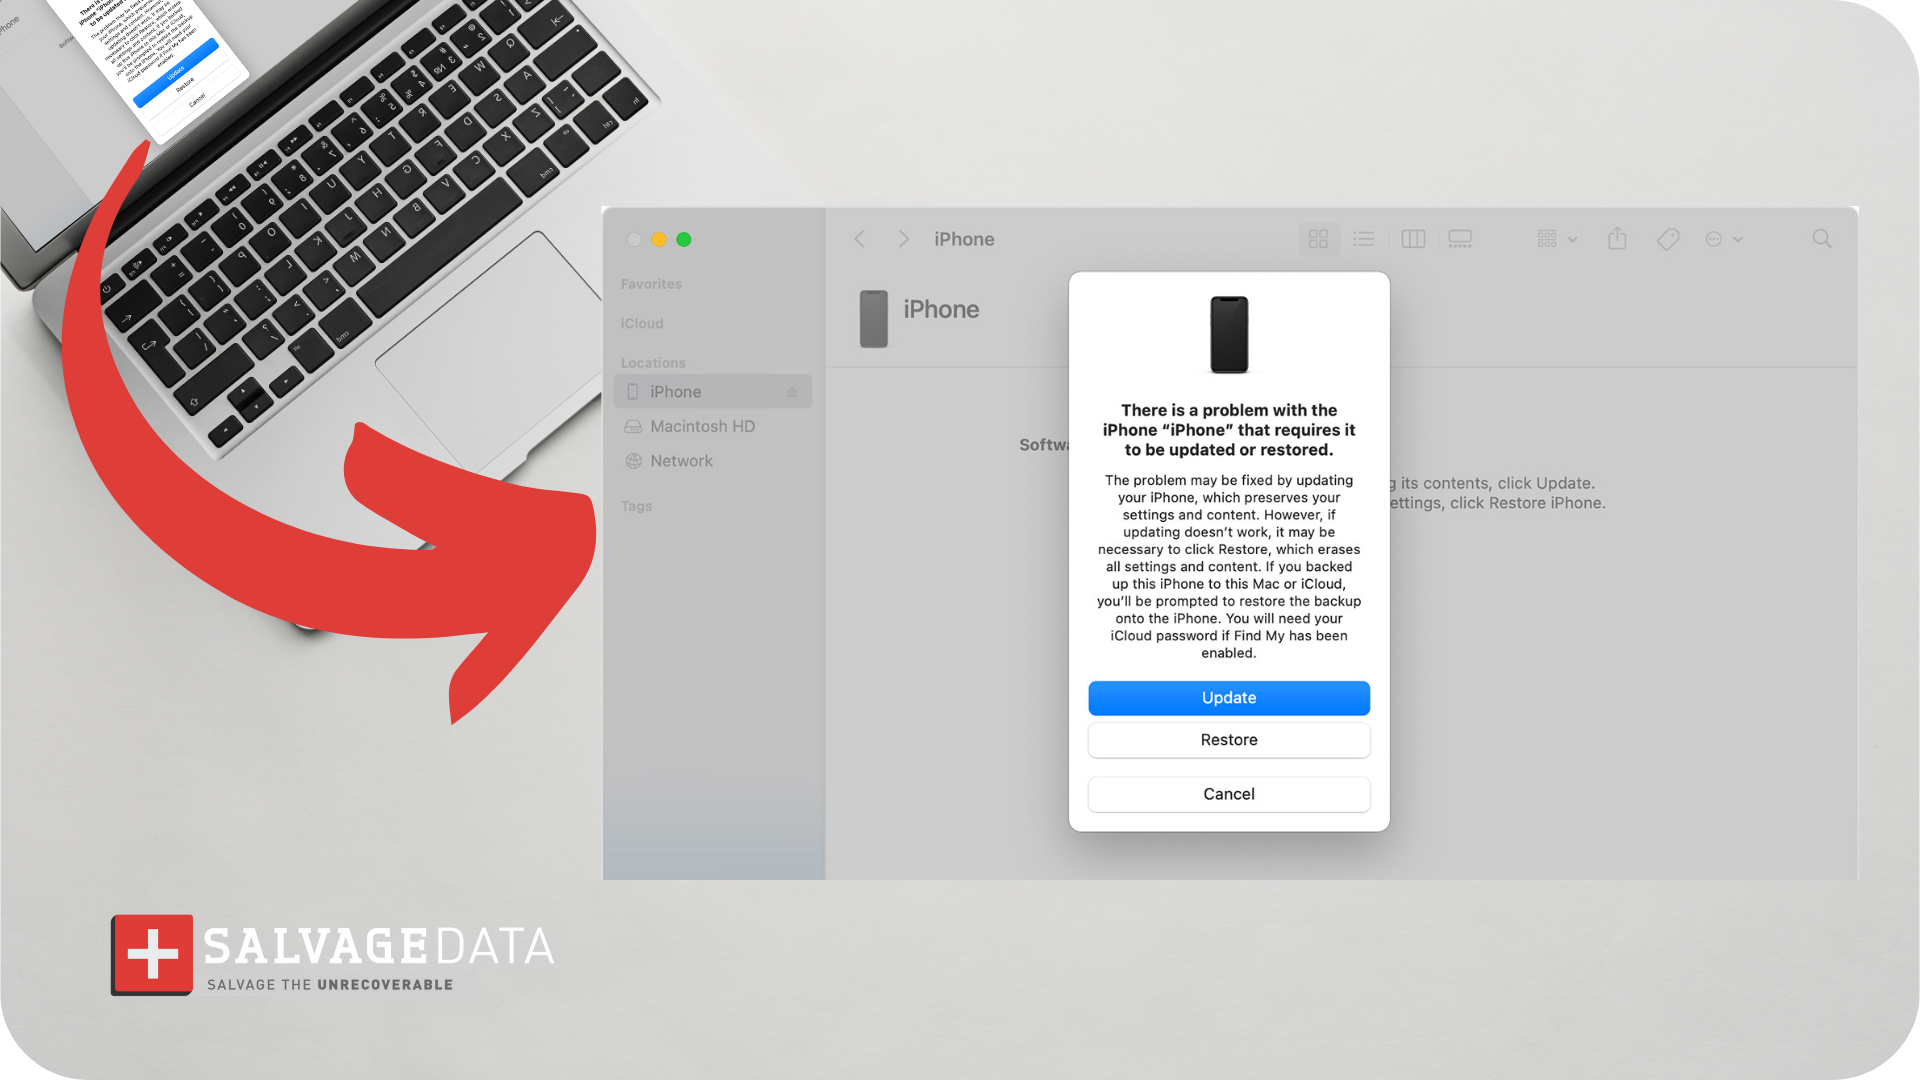
Step 4. Once the iPhone is in Recovery Mode, a pop-up will appear in iTunes or Finder, presenting two options: "Update" or "Restore".
- Update: Reinstalls iOS without erasing user data. First attempt to fix software issues while preserving data.
- Restore: Wipes the device, reinstalls the latest iOS, and returns to factory settings.
Step 5. Choose "Update". iTunes or Finder will download and install the necessary software.
Important: Do not disconnect the iPhone during this process, as it can take several minutes.
If "Update" proves unsuccessful, selecting "Restore" may be necessary. However, it is imperative to understand that this action will erase all data on the iPhone and reinstall the latest iOS version, effectively returning the device to its factory settings.
4. Check and Free Up Storage
Insufficient storage is a prevalent cause of failed iOS updates and subsequent data recovery loops. Updates require adequate free space to download, process, and install correctly.
If the iPhone is accessible, navigate to Settings > General > iPhone Storage to view available space.
Deleting unnecessary applications, photos, videos, or other large files can free up critical space.
5. Update iTunes/Finder
Compatibility issues stemming from an outdated version of iTunes on the computer can sometimes trigger the "Attempting Data Recovery" error on the iPhone.
To ensure the latest version is in use, open iTunes (on Windows) and go to Help > Check for Updates.
For macOS users, ensure the operating system is up to date, as Finder updates are integrated with macOS updates.
6. Enter DFU Mode (Device Firmware Update)
This is a deeper restore option than recovery mode, enabling iTunes to completely reinstall the system firmware. It should be considered a last resort, as it will erase all data on the device.
Steps to enter DFU Mode vary by iPhone model:
- iPhone 8 and Later
Step 1. Quickly press and release Volume Up, then Volume Down.
Step 2. Press and hold the Side button until the screen goes black.
Step 3. While continuing to hold the Side button, press and hold the Volume Down button for approximately 5 seconds.
Step 4. Then, release the Side button while still holding the Volume Down button for another 10 seconds.
The screen should remain black. This indicates that the device is ready to communicate with iTunes or Finder for a deeper system restoration.
- iPhone 7/7 Plus
Step 1. Press and hold both the Side (or Top) button and Volume Down button simultaneously for 8 seconds.
Step 2. After 8 seconds, release the Side button while continuing to hold the Volume Down button for about 5 seconds.
The screen should remain black. Connect the iPhone to your computer to restore it.
How to recover data in case Attempting Data Recovery fails
If you had to click on Restore (which will erase everything on your iPhone), or if any other mistake happens during the process, leading to data loss, there’s still hope to recover your iPhone data. You can restore your iPhone data from iCloud or iTunes backup.
Restore iPhone data from iCloud backup
After you reset your iPhone, as soon as the Apps & Data screen appears, select “Restore from iCloud Backup”.From there, you can restore the data by signing in to your Apple ID and selecting the latest backup.
Automatically back up with iCloud Backup
Make sure your iPhone data is always backed up by setting automatic backups for your iPhone.
Go to Settings > your name > iCloud > iCloud Backup.
The automatic backup of your iPhone will occur when you’re not using your iPhone, the screen is locked, and the device is connected to a power source and the internet.
Restore iPhone data from iTunes backup
With the iPhone connected to the computer, open iTunes. Select your device and then click on “Restore Backup”. After that, you can choose which backup you want to restore, click on it, and follow the on-screen instructions.
How to back up your iPhone with iTunes
To back up your iPhone using your PC, open iTunes and connect your device to it using a USB cable.
Step 1. Select the option “Trust This Computer” and, on iTunes, select your iPhone.
Step 2. Go to Summary and select the Encrypt Local Backup box if you have sensitive information, such as your Health data.
Step 3. Insert your password. Remember, you’ll need the same password to access your backup.
Step 4. Click the Backup Now button.

When to seek professional data recovery services
Professional iPhone data recovery can retrieve lost text and media data, including photos, videos, messages, contacts, notes, and calendar events, even from severely damaged or seemingly "dead" iPhones. These specialists utilize advanced tools, such as X-ray technology for precise diagnostics, proprietary techniques, and controlled cleanroom environments to work directly with internal memory components, even when the phone is inoperable.
Professional data recovery services become essential in a range of circumstances:
- Physical Exterior Damage: This includes severe physical trauma such as shattered screens, bent device shapes, broken casings, significant water damage, fire damage, or damage resulting from natural disasters like floods, hurricanes, or earthquakes.
- Internal Hardware Problems: Issues like a completely dead or overheated battery, an unresponsive touchscreen, a black or dim display, or a failing internal storage chip often point to hardware malfunctions beyond typical user repair.
- Unfixable or Unresponsive iPhone: When the iPhone is completely unresponsive, refuses to power on, or essential data cannot be accessed for unknown reasons, professional assistance is typically required.