Partitioning an external hard drive is the process of dividing it into separate, logical storage areas known as partitions. This can be done for various reasons, such as organizing data, backing up important files, or running multiple operating systems on the same drive. Partition external hard drives can also help optimize performance and improve file management.
To partition an external hard drive, you can use built-in tools like Disk Management on Windows or Disk Utility on macOS. These tools allow you to create, delete, and resize partitions on the external drive. However, before partitioning, make sure to backup all important data on the drive as the partitioning process involves changing the drive's partition table and can result in data loss if not done correctly.
It's also important to choose the right file system format when partitioning an external hard drive. exFAT is usually the best option for external drives as it provides better compatibility across different operating systems and can store large files compared to other file systems like FAT32 or NTFS.
How to partition external hard drives on Windows 11/10 with the Disk Management tool
Here are the steps to partition an external hard drive on Windows using the Disk Management tool:
- Connect the external hard drive to your computer.
- Open Disk Management by pressing the Windows key + X and selecting Disk Management from the menu that appears.
- Locate the external hard drive in the list of disks displayed in Disk Management.
- Right-click the unallocated space on the external hard drive and select New Simple Volume.
- Follow the prompts in the New Simple Volume Wizard to set the size of the partition, assign a drive letter, and format the partition with a file system (e.g. exFAT or NTFS).
- Once you've completed the wizard, the new partition will appear in Disk Management and will be ready for use.
Warning: If the external hard drive already contains data, creating a new partition will erase all existing data on the drive. Be sure to back up any important data before proceeding.
How to partition external hard drives on Windows 11/10 via DiskPart
The DiskPart tool can be dangerous if not used correctly. Be sure to double-check the disk number and partition size before executing the commands to avoid accidentally deleting or formatting the wrong disk or partition.
Here are the steps to partition an external hard drive on Windows using the DiskPart command-line tool:
1. Connect the external hard drive to your computer.
2. Open Command Prompt by pressing the Windows key + R and then typing cmd, and pressing Enter. You can also type cmd in the Windows search bar, and then choose to Run as Administrator.
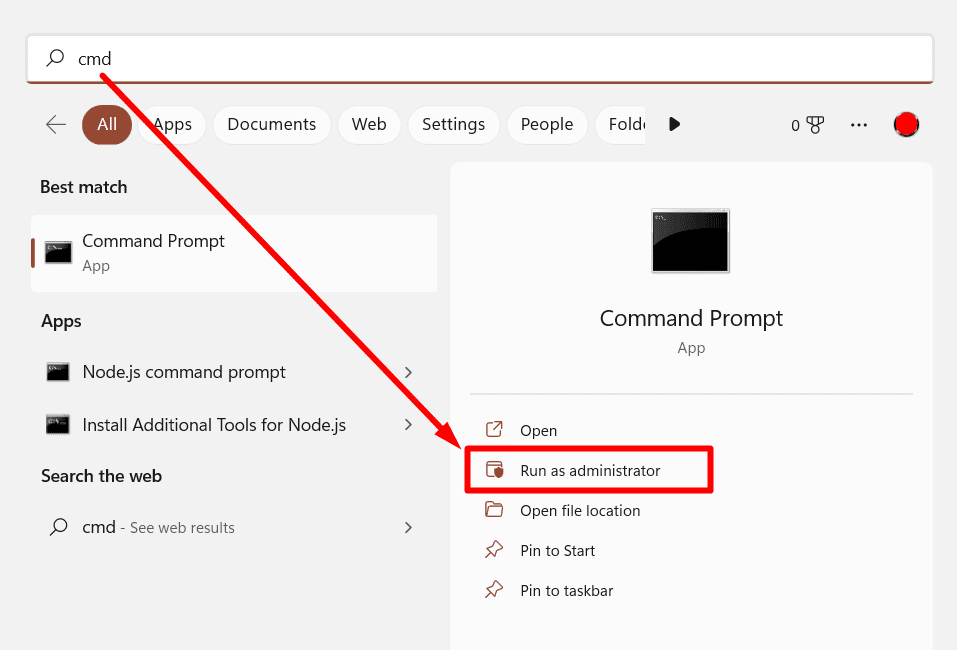
3. Type diskpart and press Enter. If you're prompted for permission to run Command Prompt as an administrator, click Yes.
4. Type list disk and press Enter to display a list of disks connected to your computer. Make a note of the disk number assigned to your external hard drive.
5. Type select disk X. Replace X with the disk number assigned to your external hard drive) and press Enter.
6. Type clean and press Enter to erase all data from the external hard drive.
7. Then, type create partition primary size=Y (replace Y with the desired size of your partition in MB) and press Enter.
8. Type format fs=exfat quick and press Enter to format the partition with the exFAT file system.
9. Type assign letter=X (replace X with the desired drive letter for the partition) and press Enter.
10. Once you've completed these steps, the new partition will be ready for use.
How to partition external hard drives on macOS
Like with any disk-related operation, it's important to back up any important data before partitioning an external hard drive.
Here are the steps to partition an external hard drive on macOS using the built-in Disk Utility:
- Connect the external hard drive to your Mac.
- Launch Disk Utility by selecting it from the Utilities folder in the Applications folder or by searching for it with Spotlight.
- Select the external hard drive from the list of drives on the left-hand side of the Disk Utility window.
- Click on the Partition button in the toolbar at the top of the Disk Utility window.
- In the Partition Layout section, select the number of partitions you want to create and adjust their sizes as needed. You can also give each partition a name and choose the file system format (e.g. exFAT).
- Once you've configured the partition layout, click on the Apply button to create the new partitions.
- Disk Utility will display a confirmation message warning you that creating new partitions will erase all data on the selected drive. If you're sure you want to proceed, click on the Partition button to continue.
- Once the partitioning process is complete, the new partitions will appear on your desktop and be ready for use.
Why should you partition external hard drives?
It's important to note that while partitioning can provide some benefits, it may not be necessary or appropriate for everyone. You should consider your specific needs and usage patterns before deciding whether to partition your external hard drive.
There are several reasons why you might want to partition an external hard drive:
- Organize data. Partitioning allows you to separate your data into different storage areas, making it easier to organize and find specific files.
- Backup. You can use one partition to store important files that you want to back up regularly and another partition for less critical data.
- Performance. Creating multiple partitions on an external hard drive can help improve performance by reducing fragmentation and optimizing the use of available space.
- Multiple operating systems. If you want to run multiple operating systems on the same external hard drive, partitioning can help you keep each system separate and prevent conflicts.
- Security. Partitioning can make it more difficult for cybercriminals to access all your data if they manage to gain access to one partition.
Can you lose data after partitioning your external hard drive?
Yes, it’s possible to lose data when partitioning an external hard drive. Mistakes such as accidental deletion or formatting the wrong partition, particularly if the user is not meticulous during the process, can result in lost data. Data may also be compromised if the partition table becomes corrupted due to unforeseen circumstances like power failures or malware attacks.
Additionally, the added strain on hardware components during partitioning can potentially cause hardware failure, making the entire hard drive inaccessible. Thus, it is critical to back up any and all vital data before partitioning and follow best practices to reduce the chances of data loss.
How to recover lost data after partitioning an external HDD?
If something went wrong while partitioning your external hard drive and you do not have a backup of its data, then you can use data recovery software or contact a hard drive data recovery service to retrieve your files.
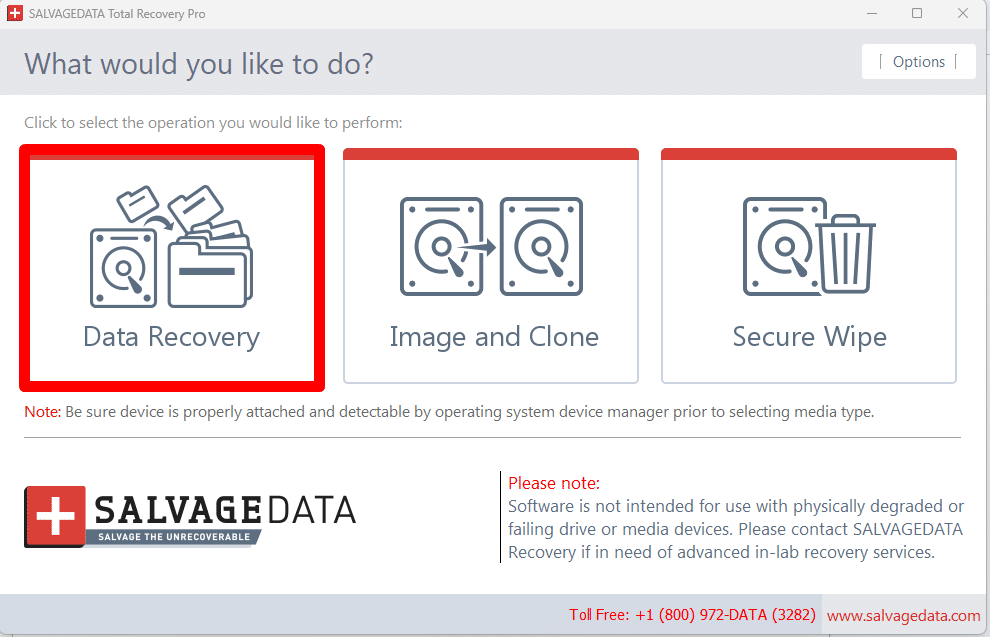
SalvageData free data recovery tool is available for Windows and macOS. To use it, first, you must download and install the software.
Agree with the terms and conditions and then click on the DATA RECOVERY button.
After that, select the drive you wish to retrieve your files from. Then, click on RECOVER.
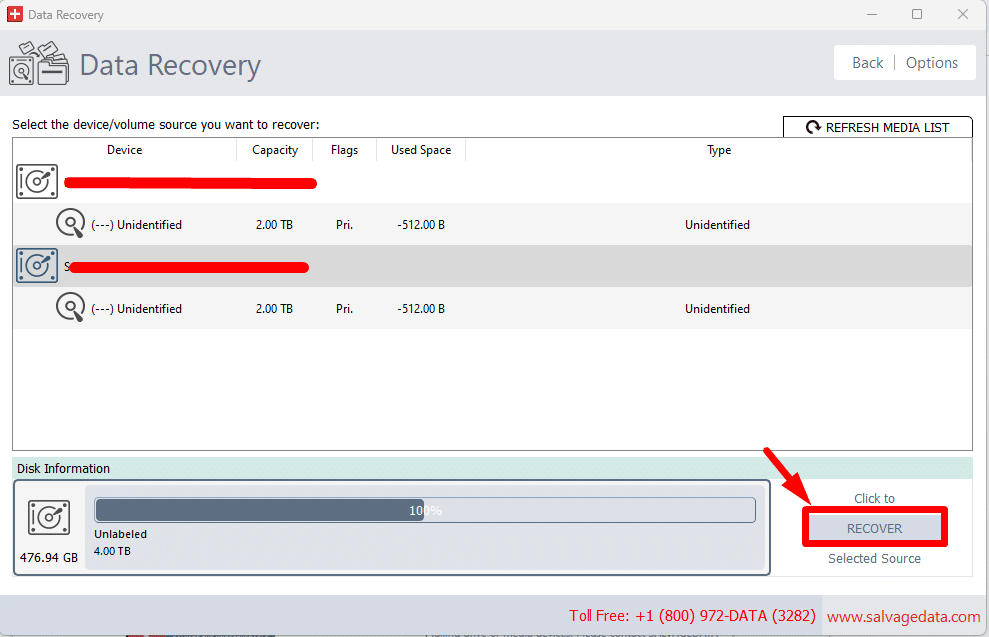
Choose the file system and click on SCAN.Once the scanning process is complete, you can choose from the list which files you want to recover.