Most external hard drives come pre-formatted for Windows, but if you're using a Mac or plan on switching between operating systems (OS), you'll need to format the drive accordingly to a chosen OS.
Warning: Formatting a drive erases all the data on the drive.
Keep in mind that formatting an external hard drive will erase all the data on the drive. Be sure to back up any important files before formatting. Once you've backed up your data, you're ready to format your external hard drive and use it with Windows or macOS.
Summary: Choosing the right format for your drive is important if you want to be able to use it with both Windows and macOS. Formatting a drive for Windows will make it compatible with that operating system, but you won't be able to use the drive with a Mac unless you format it for that as well.
Before Formatting Your External Hard Drive
As we mentioned before, formatting a hard drive will erase all the data on the drive. Be sure to back up any important files before formatting. Once you've backed up your data, you can format your drive for Windows or macOS according to the instructions for each system.
How to Choose a File Format
When you format a drive, you'll need to choose a file format. The most common file formats are NTFS, FAT32, and exFAT.
- NTFS is the default file format for Windows and is designed for drives that will be used with Windows computers.
- FAT32 is an older file format that's compatible with both Windows and macOS.
- exFAT is a newer file format compatible with both Windows and macOS.
- APFS (Apple File System) is the default format for Mac. If you’ll use your external HD only on macOS, then this is the preferred format.
- macOS Journaled is a specific format for macOS that you can use if you don’t need your files to be encrypted.
- macOS Extended encrypts your files and requires a password. It’s also known as HFS+ (Hierarchical File System Plus)
If you're not sure which file format to choose, we recommend using NTFS for Windows drives and exFAT for both Windows and macOS drives. For a macOS-exclusive format, we recommend APFS.
Reformatting your hard drive on Windows
If you're using Windows 7 or more recent versions, you can follow the next steps to format a new hard drive or reformat a used one, including an external hard drive using a macOS format.
Formatting a new external hard drive on Windows
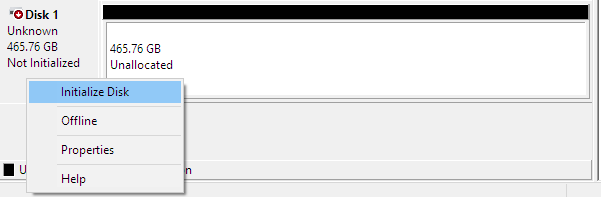
Step 1. Press Windows key + R to open Disk Management.Type diskmgmt.msc then click OK. Step 2. Find the disk and right-click on it to select Initialize Disk.
Step 3. Select the partition style:
- MBR for drives under 2TB
- GPT for drives over 2TB
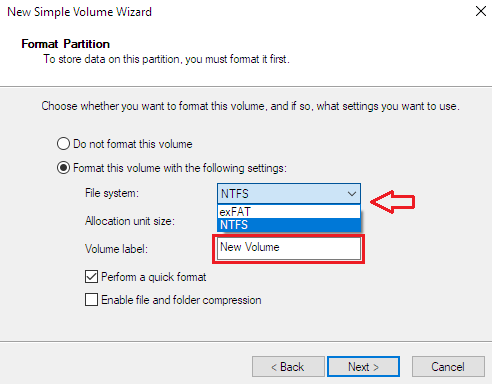
Click OKStep 4. Right-click the Unallocated box, and select New Simple Volume. Click next until the tab Choose a File system appears.
- Use NTFS if you’re not using the hard drive on Mac
- Use exFAT if you’re using the external hard drive on both Mac and Windows computers.
Click Next then Finish
Reformatting an external hard drive on Windows
Step 1. Press Windows key + R to open Disk Management.Type diskmgmt.msc then click OK. Step 2. Find the disk and right-click on it to select Initialize Disk.Step 3. Right-click the Partition box, and select Format
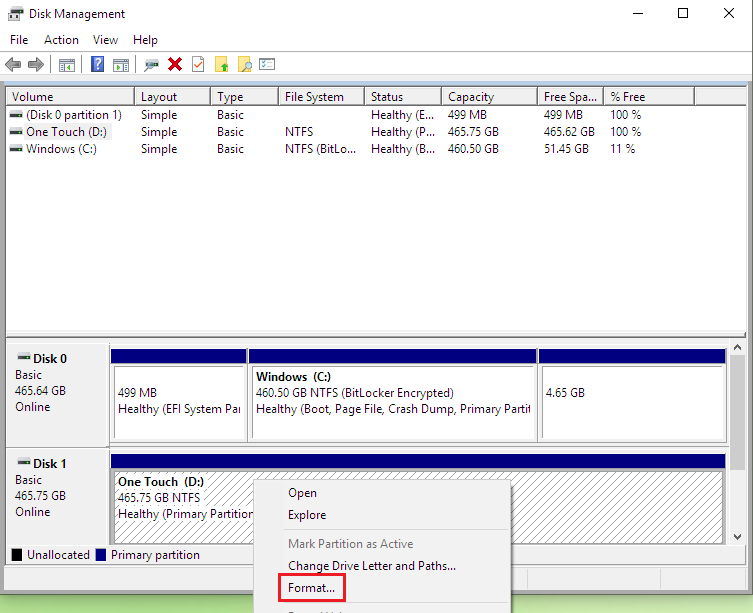
Step 4. Customize your drive name and choose a file system.
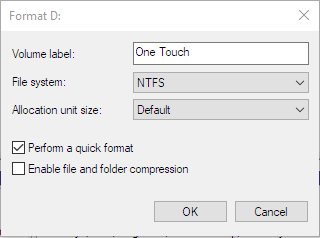
- Use NTFS if you only use your external hard drive on Windows.
- Use exFAT if you need to allow both Mac and Windows computers to read and write to the storage device.
Once the volume displays Heath (Primary Partition), you may close the Disk Management.

Reformatting a previously formatted Mac hard drive on Windows
A hard drive previously formatted for Mac will appear on Disk Management as a list of three partitions. One of them is a protected partition.
To delete it, you need to use the Microsoft Diskpart Erase utility.
Press and hold the Windows key + R and then type diskmgmt.msc in the run box field then click OK to learn the disk number.

Take a note of the disc number, you’ll need it later.
Important: Disconnect any other drive from your computer to avoid erasing the wrong driver. Diskpart Erase will permanently destroy all data on the selected drive. Double check if you’re selecting the right drive.
Step 1. Press Windows key + R to open Disk Management.
Type cmd then click OK.

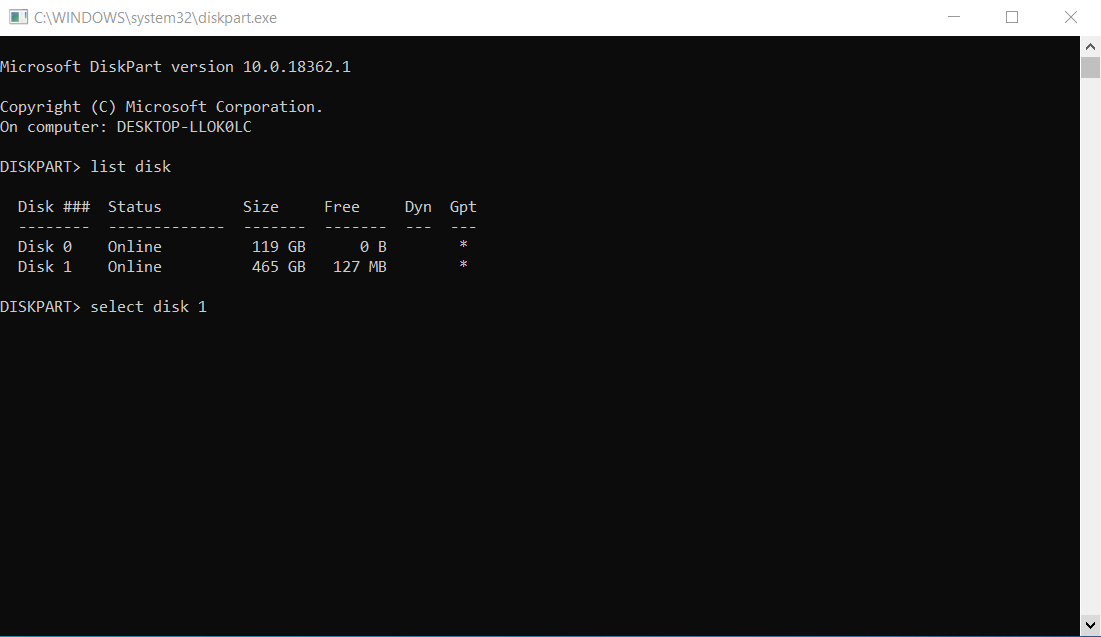
Step 2. Type diskpart then press Enter. Then type List Disk and press Enter.
As the disk list shows, select the disk you want to format by typing select disk 1 (replace 1 by the disk number).
Step 3. Once the Command Prompt displays the message Disk 1 is the selected disk, you can type Clean and press Enter.
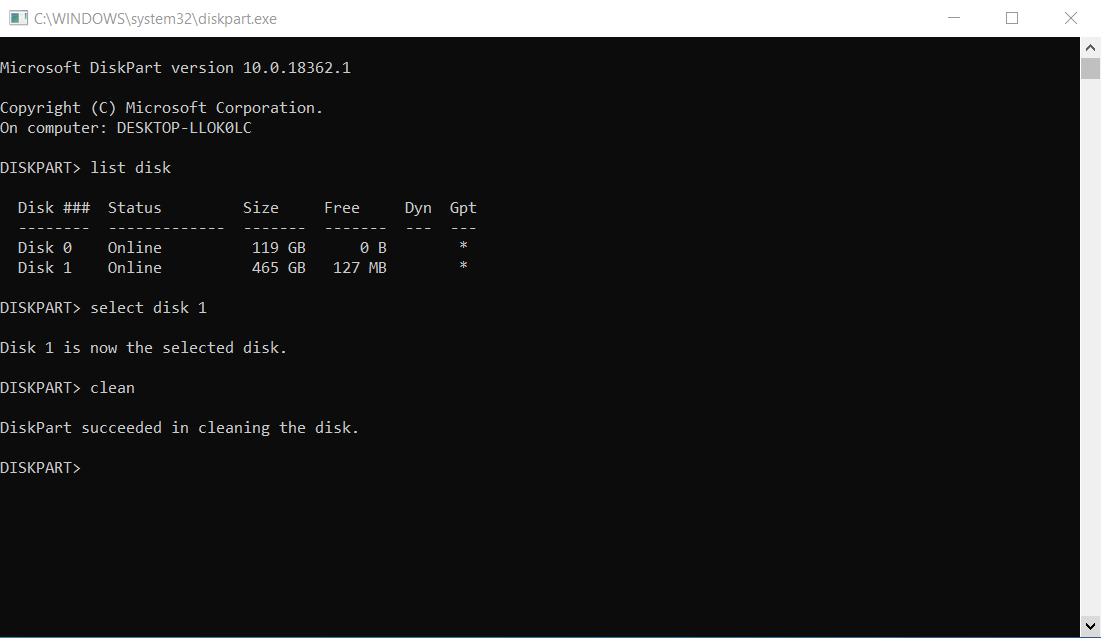
You’ll see then the DiskPart succeeded in cleaning the disk message. You can close the Command Prompt. Now you can format your hard drive as if it’s a new one.
Summary: Usually you will not need to format a new external hard drive for Windows since most models are designed for this operating system. But, a reformatted one or a hard drive formatted for macOS will require you to format the hard drive for Windows.
Reformatting your drive in macOS
If you’re using macOS 11 (Big Sur) or more recent versions in your Mac, then you’ll have to choose which format for your drive you prefer: Mac OS Extended (Journaled), APFS, or ExFAT.
How to format hard drive Mac OS Extended (Journaled) on macOS
Mac OS Extended (Journaled) is not the default format when using Time Machine on macOS 11 and later. And this format doesn’t work on Windows. If you need to use your external HD on multiple devices, then format it for ExFat.
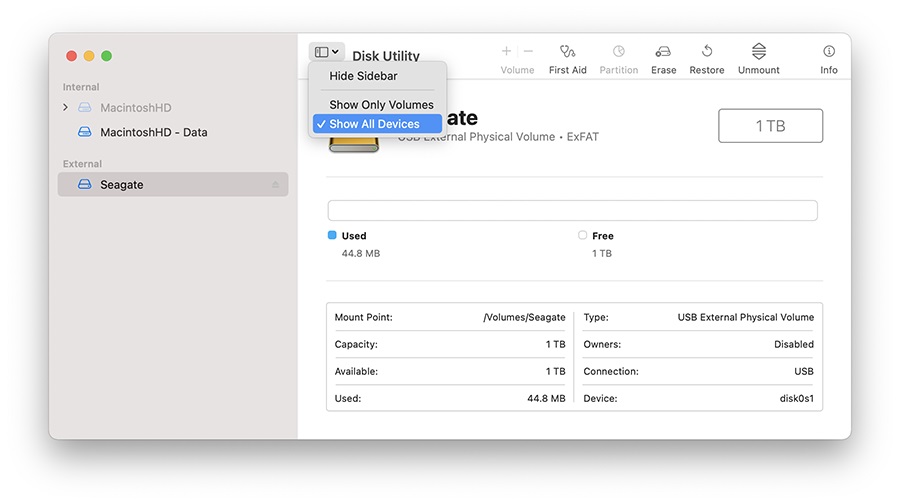
Step 1. Open Finder > Applications > Utilities > Disk UtilityStep 2. Go to the View menu in the upper left and select Show All Devices
Step 3. Click on Erase.
It will open a new window where you can change the hard drive name, format, and Scheme. Select the Mac OS Extended (Journaled) format on the dropdown menu.
Set Scheme to GUID Partition Map.
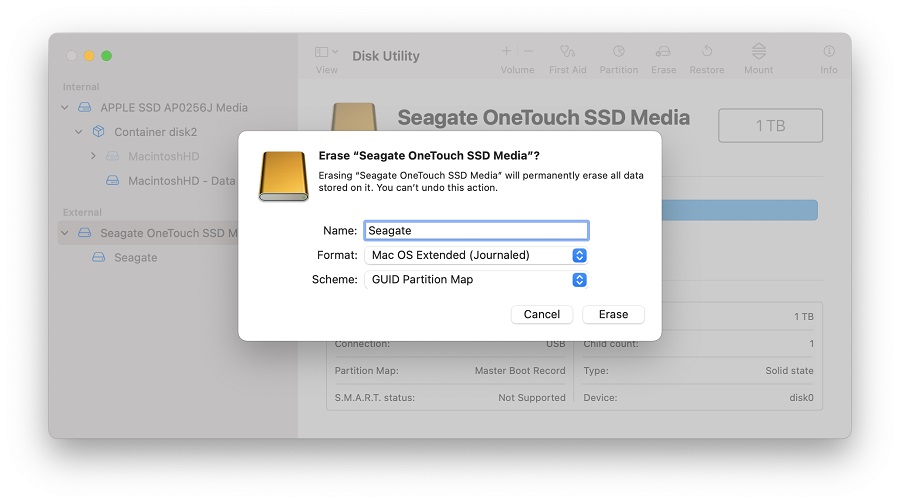
Step 4. Click on Erase so the Disk Utility can start formatting the external HD.
How to format external hard drive APFS on macOS
Before proceeding, keep in mind that the APFS format is not supported on earlier macOS versions. So, if you’re not using macOS Big Sur or more recent versions, don’t format your external HD for APFS. This format is exclusive to Mac users.
Important: The Scheme on APFS must be set to GUID Partition Map.
Step 1. Open Finder > Applications > Utilities > Disk Utility
Step 2. Go to the View menu in the upper left and select Show All Devices
Step 3. Click on Erase. It will open a new window where you can change the hard drive name, format, and Scheme:
- Provide a Name for the volume
- Set Scheme to GUID Partition Map
- Set Format to APFS

Step 4. Click on Erase so the Disk Utility can start formatting the external HD.
How to format external hard drive ExFAT on macOS
Although you can use ExFAT format on both Mac and Windows computers, ExFAT is not compatible with Time Machine. Always remember to safely eject your ExFAT external hard drive to prevent corruption.
Step 1. Open Finder > Applications > Utilities > Disk Utility
Step 2. Go to the View menu in the upper left and select Show All Devices
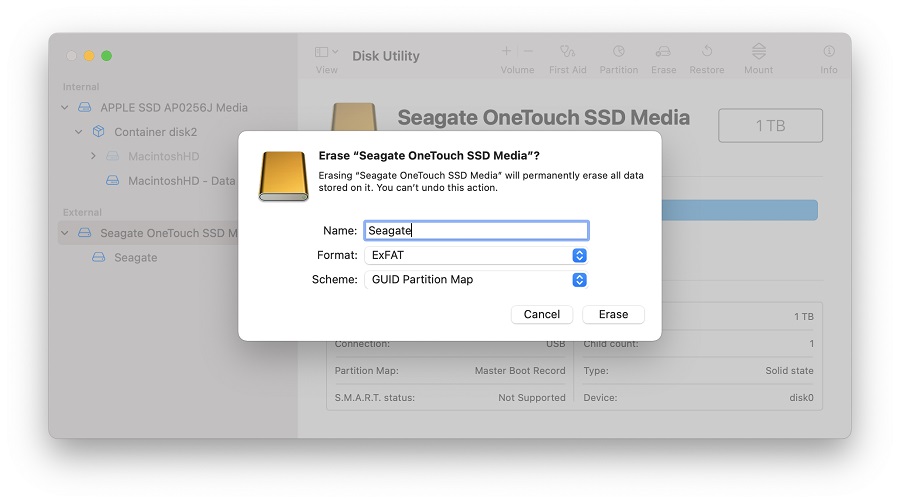
Step 3. Click on Erase. It will open a new window where you can change the hard drive name, format, and Scheme:
- Provide a Name for the volume
- Set Scheme to GUID Partition Map
- Set Format to ExFAT
Click on Erase and finish the formatting.
Summary: There’s a high chance that you’ll need to format your external hard drive for Mac, even a new one. But, the steps are simple and you’ll be able to choose your preferred format to use the external HD on any operating system you like.
For any issue with your external hard drive data, or if you need help reformatting, make sure to contact a SalvageData expert near you.